Isaac Sim Mining Robot Part 1 - Creating the environment
Read Part 0 first
Introduction
What I’m trying to do is re-create what will happen in the real world when creating a digital twin. How would that happen? Well one option is using a drone to create a 3D model of the environment, which is what I’ll simulate here. I’ll start with a set of aerial images and create a 3D model, then import it into Isaac Sim.
The sample data
I’m going to start with this dataset captured by a senseFly drone:
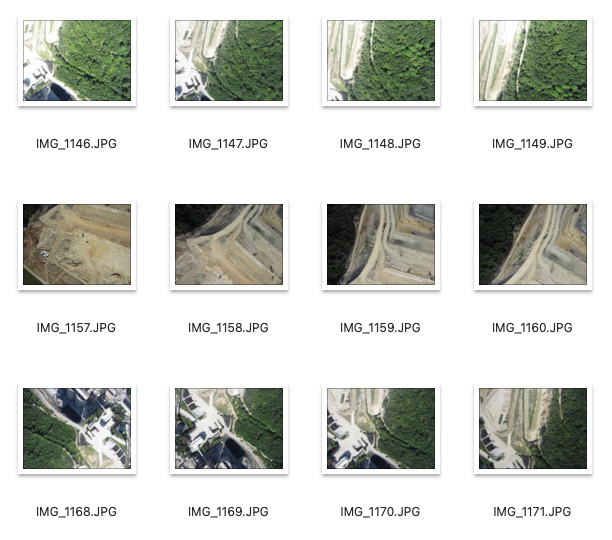
You can download the processed model from the link above but I’ll start with the raw images because I also want to do some photogrammetry. Here are some of the aerial photos:
Photogrammetry
You can extract a 3D model from 2D images using a process called photogrammetry. This is a common method for creating a 3D model from aerial images captured by a drone or by some other method. I’m using COLMAP. COLMAP is free and open source. COLMAP will process the images → figure out the camera angles for each photo by matching features in each image → create a point cloud → create a mesh.
I just used the default reconstruction parameters and COLMAP did the rest.
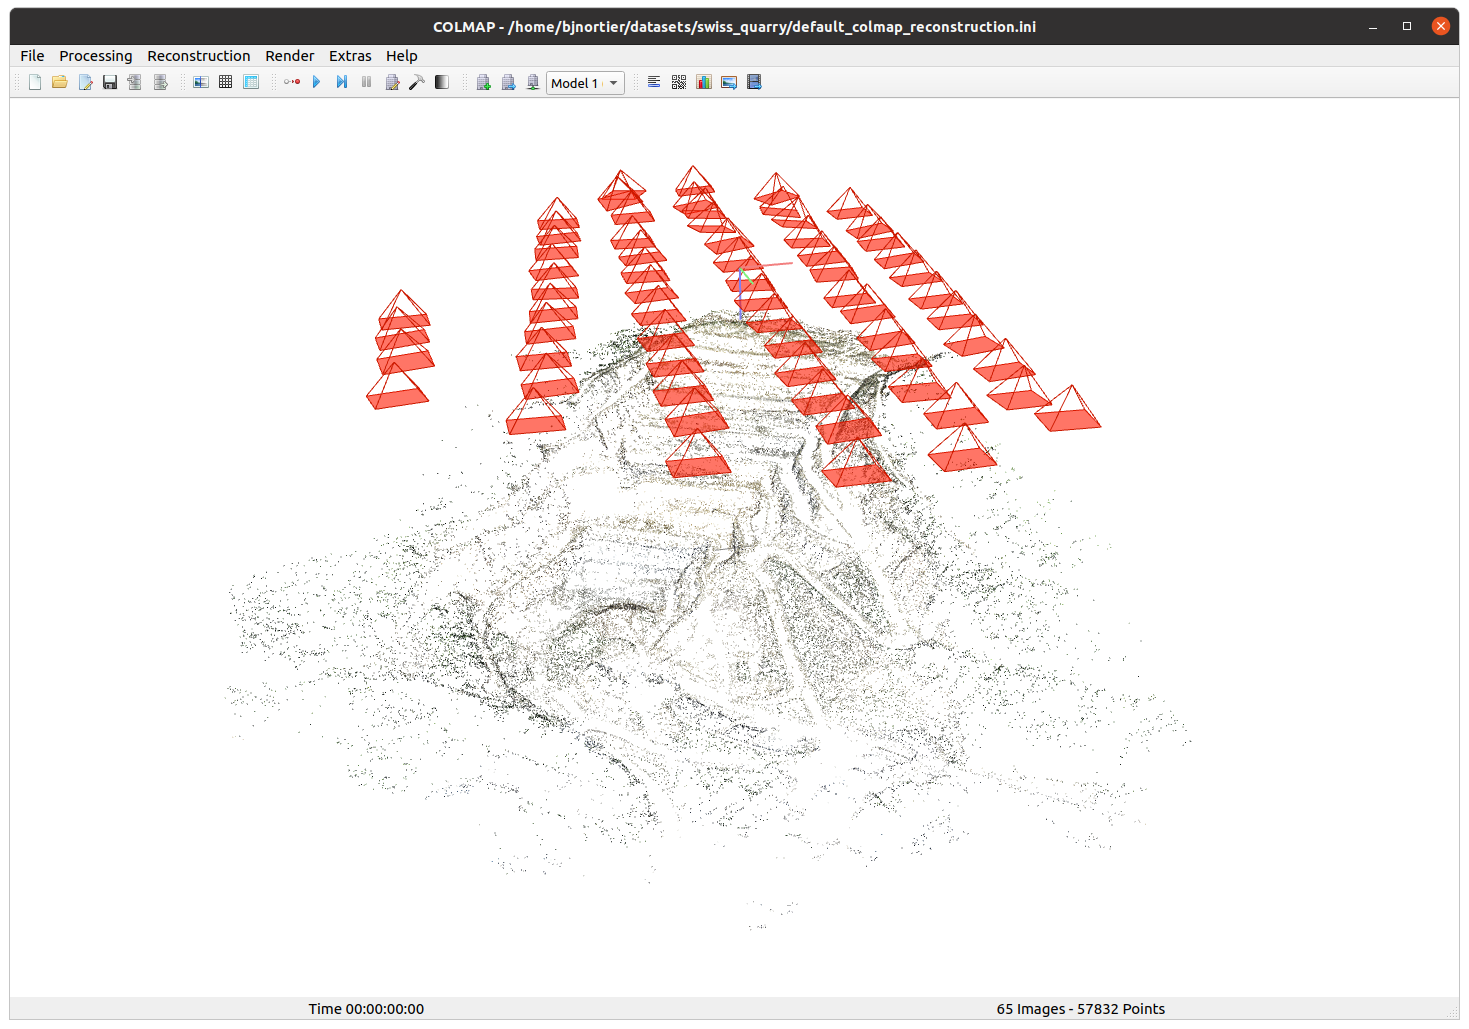
The first step is to determine the camera positions and create a sparse point cloud. This took about 7 mins on my machine. Here you can see the sparse point cloud and calculated camera positions and orientations:
The next step is to create a dense pointcloud and mesh using Poisson Surface Reconstruction. This took about 2 hours on my machine.
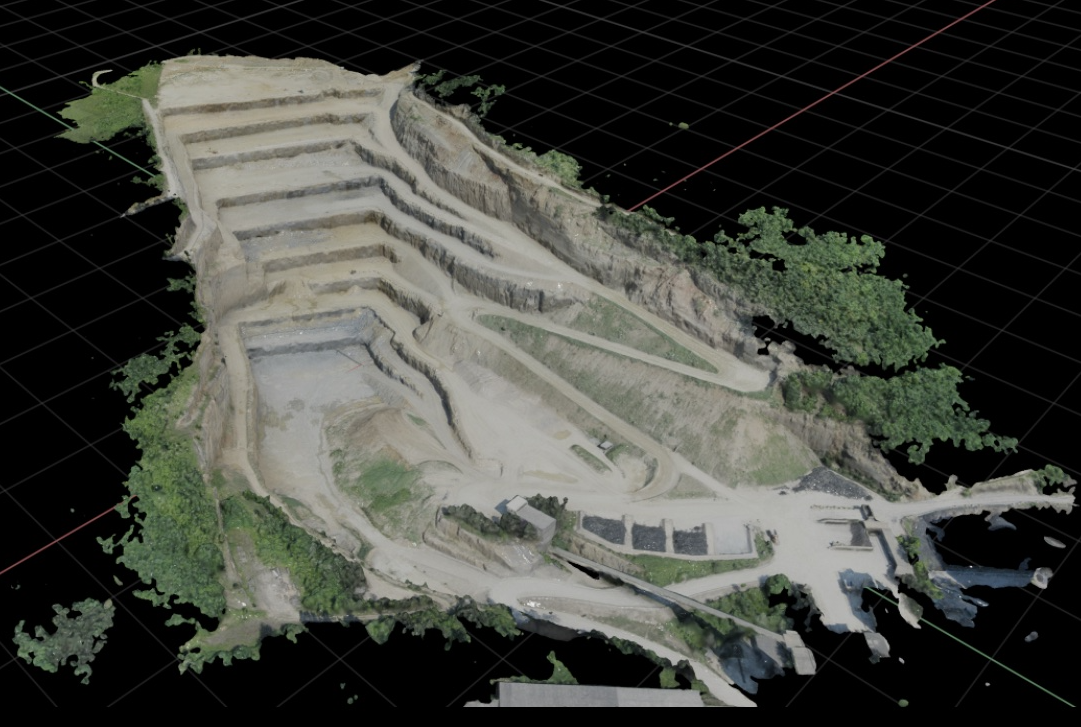
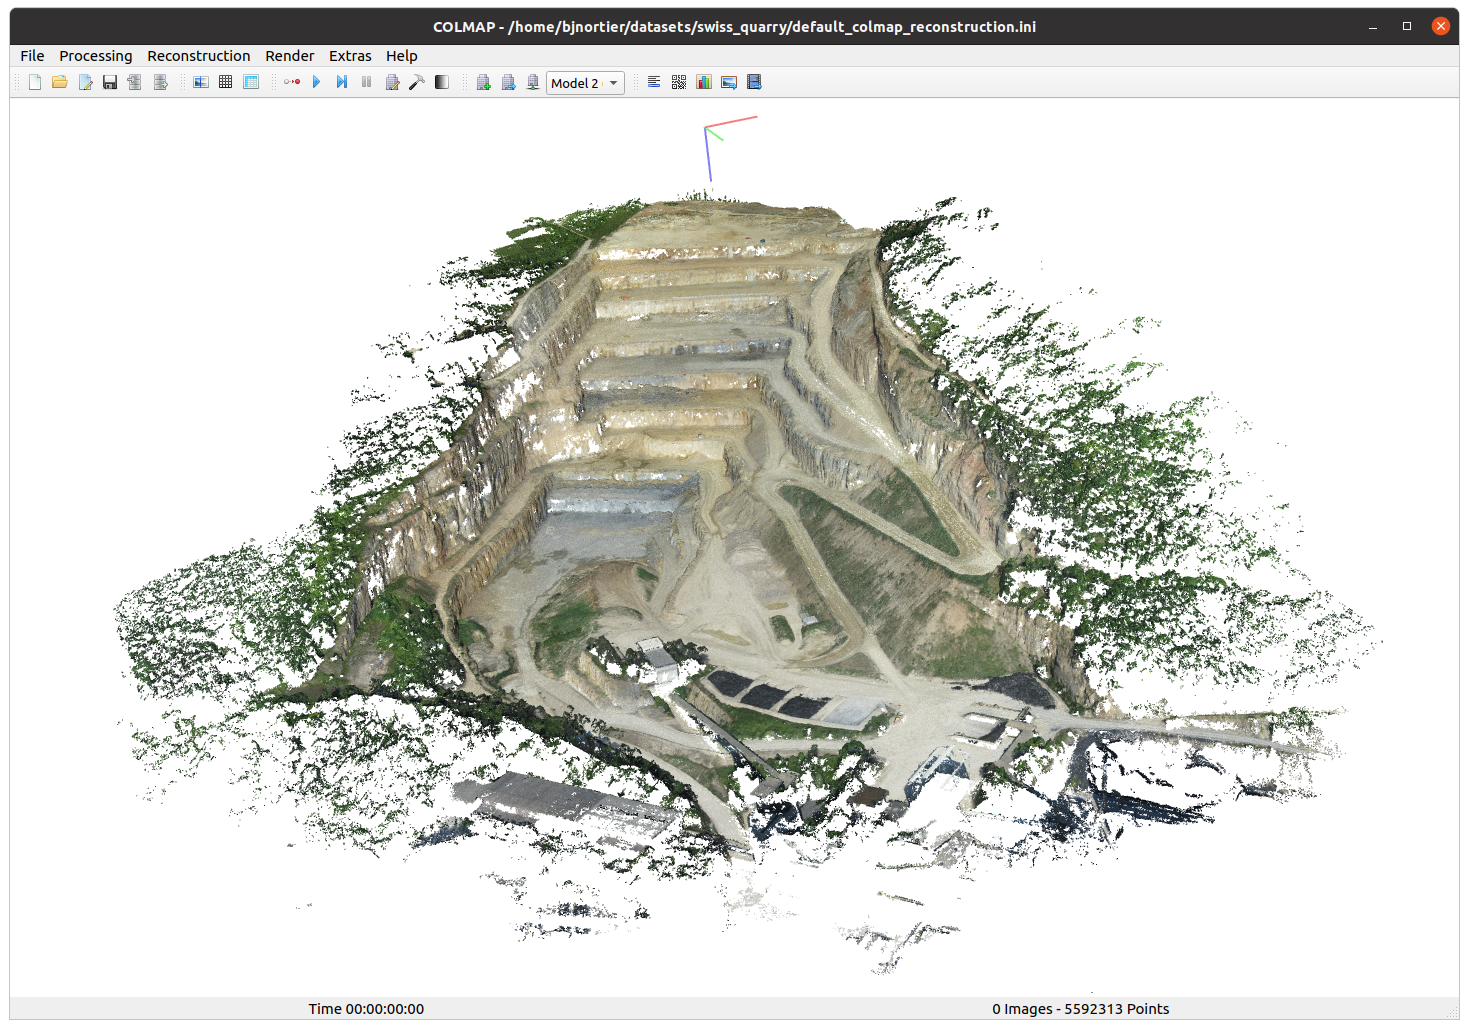
Here is the resulting dense point cloud:
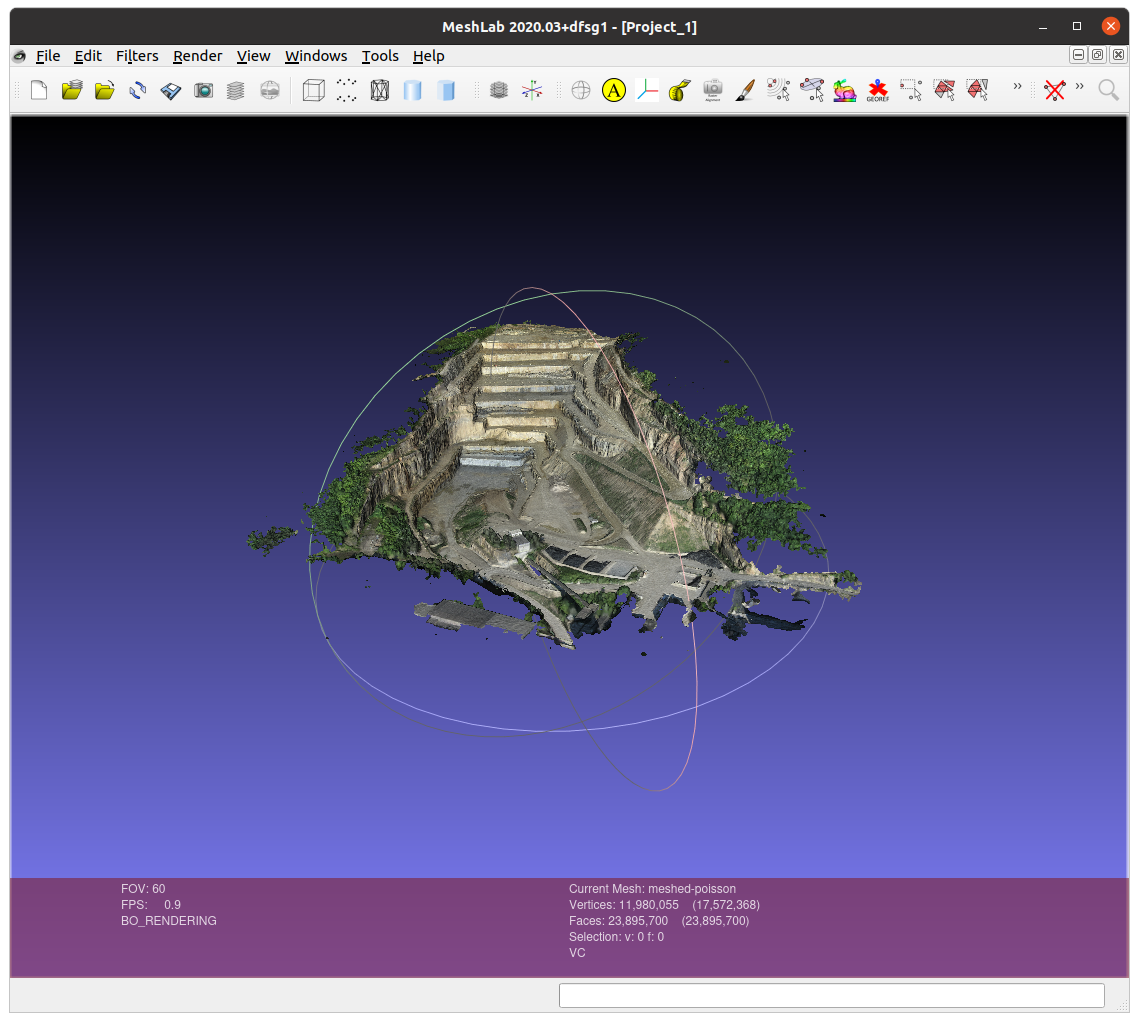
And the mesh:
Note the following characteristics:
- Sparse point cloud: 57 832 vertices
- Dense point cloud: 5 592 313 vertices
- Mesh: 11 980 055 Vertices and 23 895 700 Faces 😱
Meshlab struggles to handle the mesh, and I have a beefy machine with 64GB of RAM and an 8GB RTX 3070 GPU. I thought some mesh simplification would be required before importing into Isaac Sim (I was wrong, see below).
NeRF Side Quest
There is another option for creating a 3D model from images that has some potential - Neural Radiance Fields (NeRF), although the purpose of NeRF is not to create a 3D model but to enable synthesis of a view from any view direction. The paper can be found here. NVIDIA has an fast implementation called “Instant NeRF”.
Using the NVIDIA implementation I could create this NeRF representation of the same quarry:
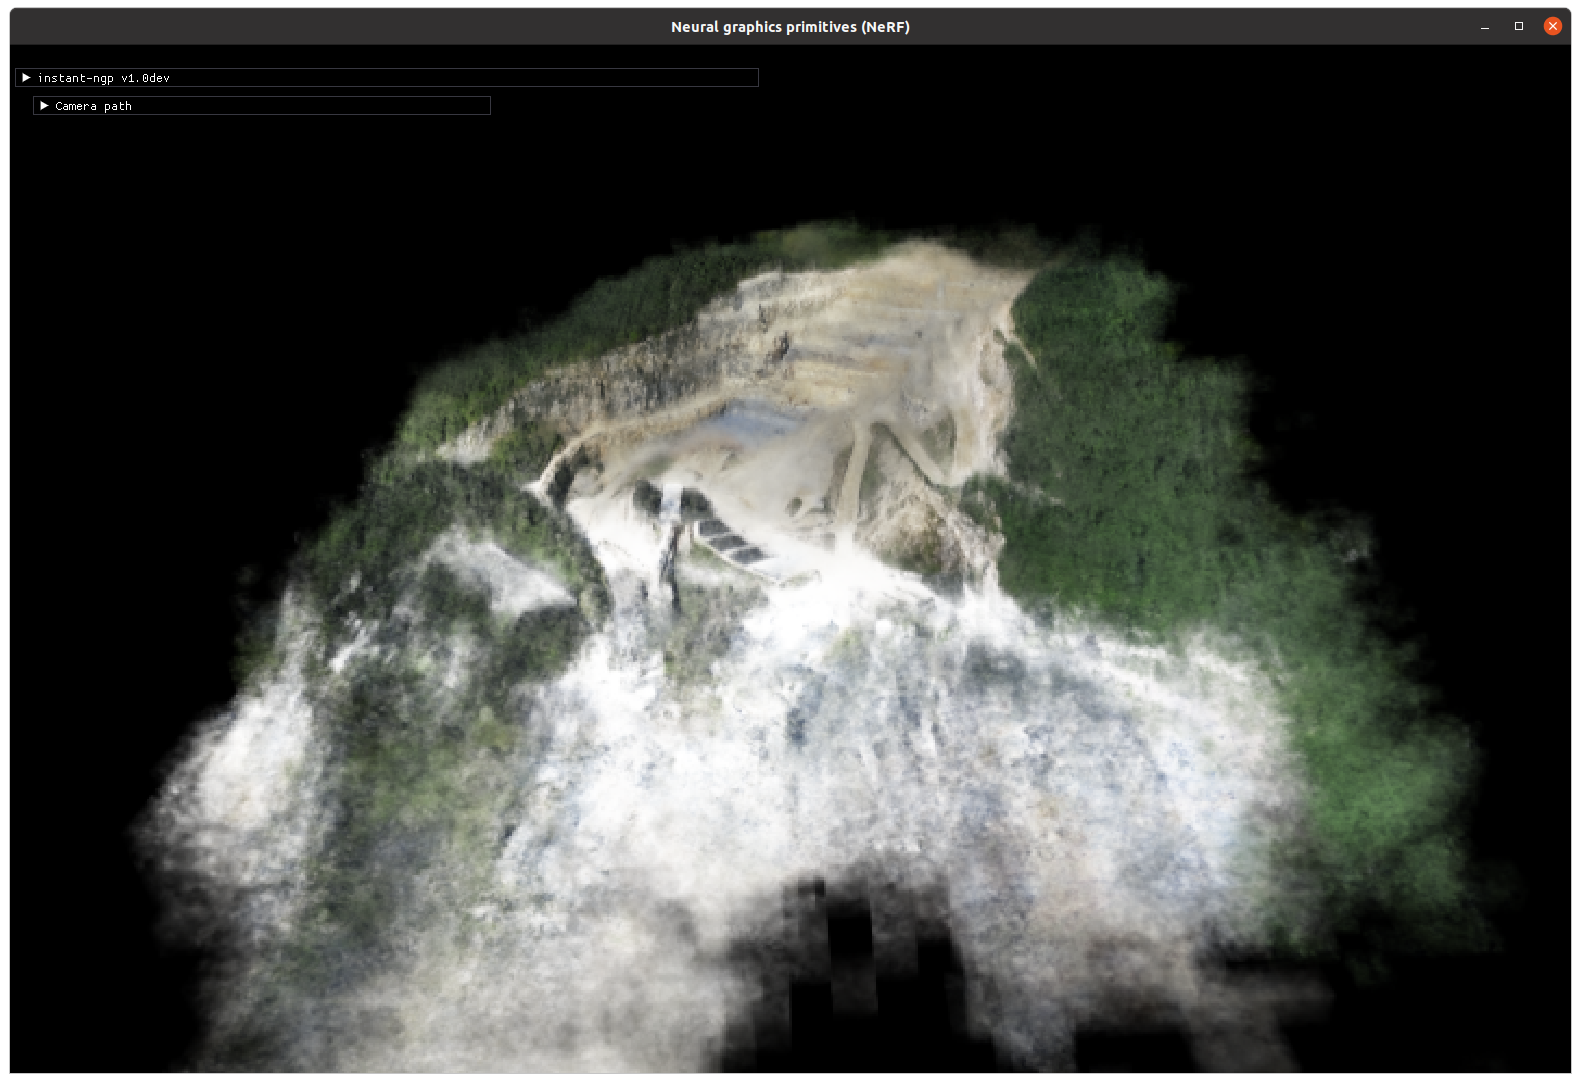
It is possible to extract mesh from a NeRF using marching cubes, but it needs some extra work in my experience. The advantage of NeRF is that it’s MUCH faster than the COLMAP densification — 7 minutes vs 2 hours.
I think this is something to keep an eye on, certainly for rapid visualisation of aerial imagery. Maybe there’s a better way to generate a mesh from a NeRF I’m not aware of… not sure. I consider it “experimental” at this point.
Import in Isaac Sim
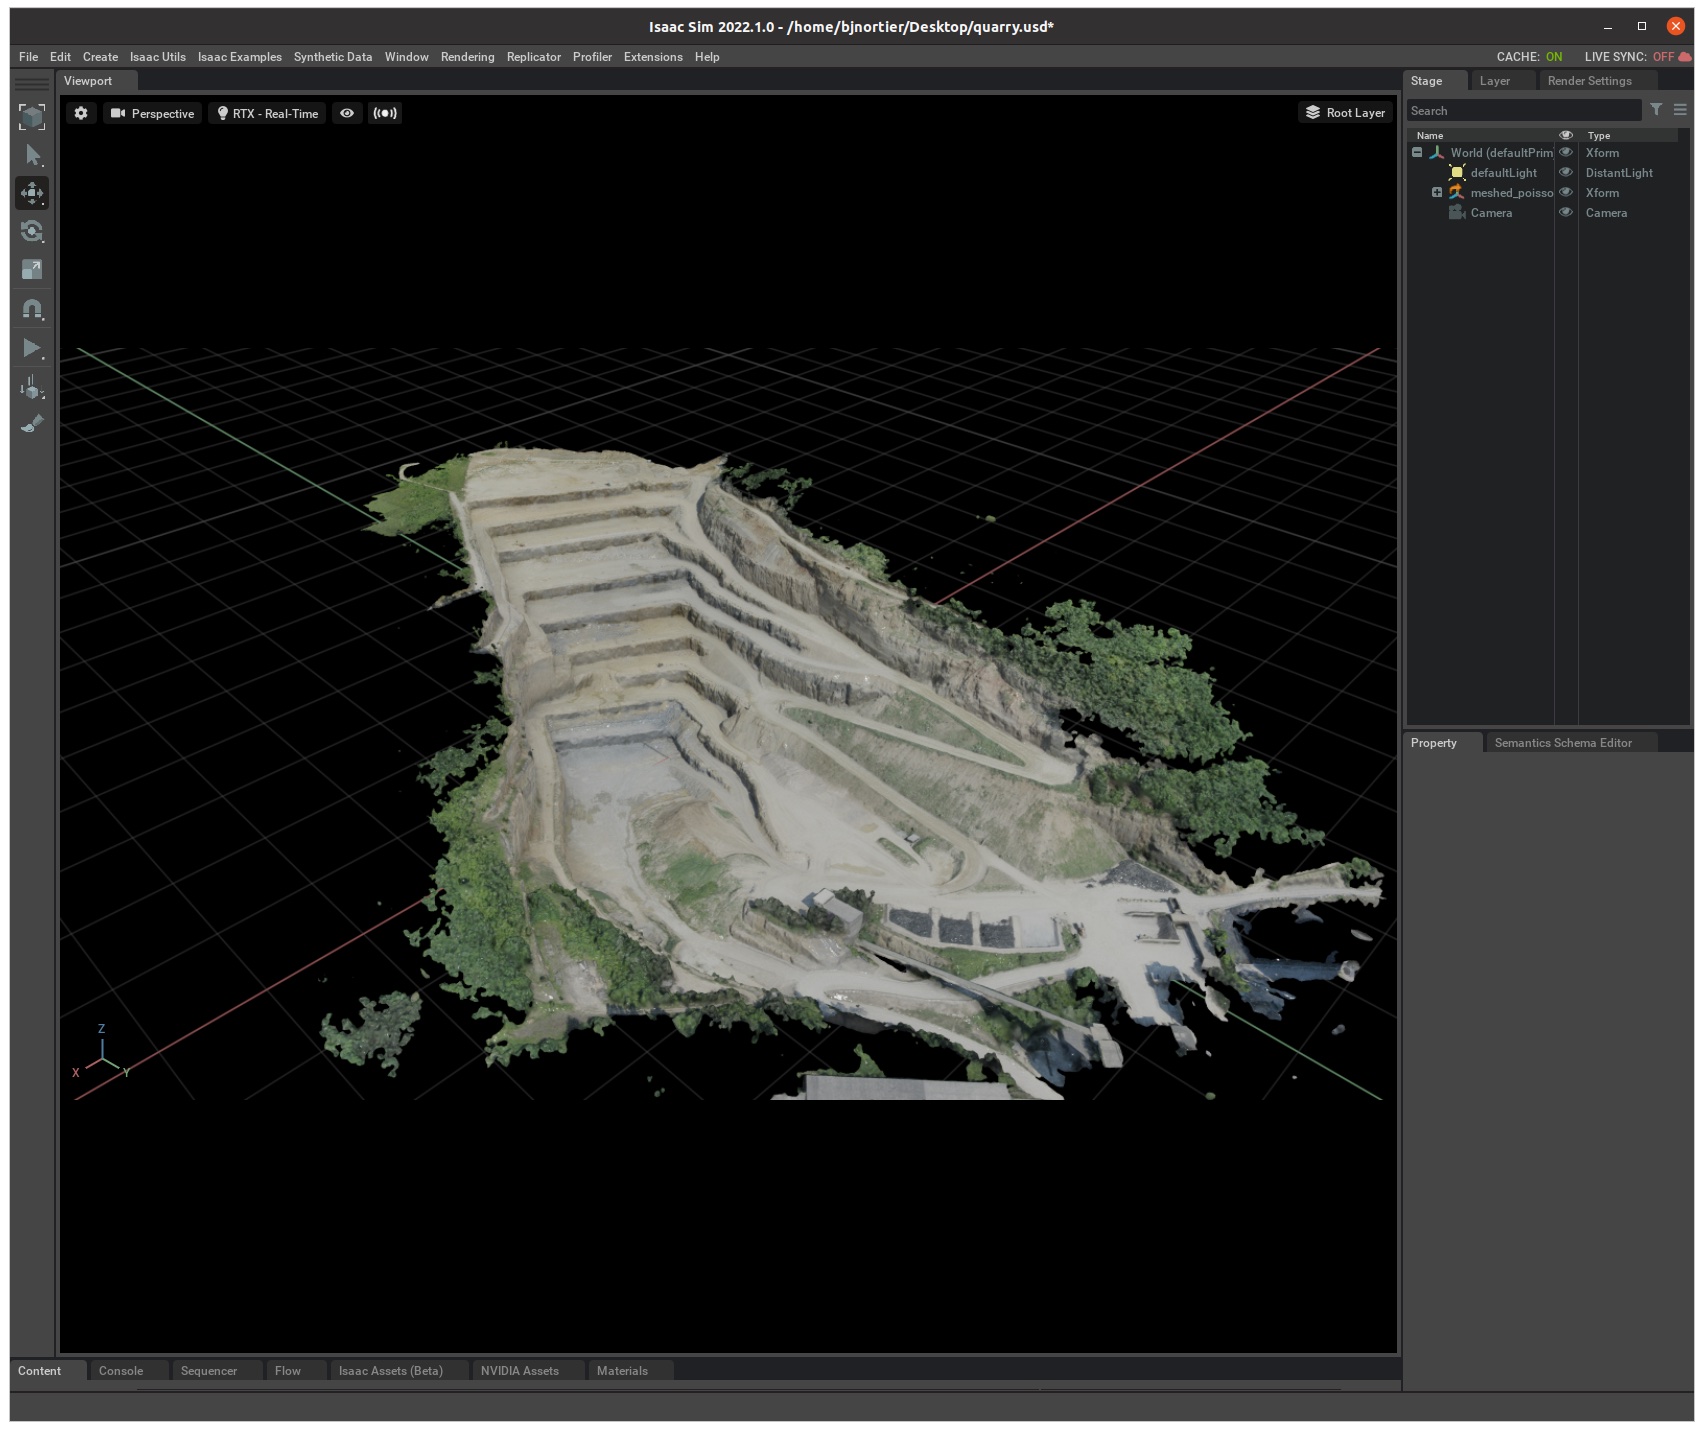
This turned out a bit better than I expected considering the performance of MeshLab opening the 3D model. I simply had to export it (using Meshlab) as an “Alias Wavefront Object (.obj)” that Isaac Sim supports and importing using “File” → “Import”:
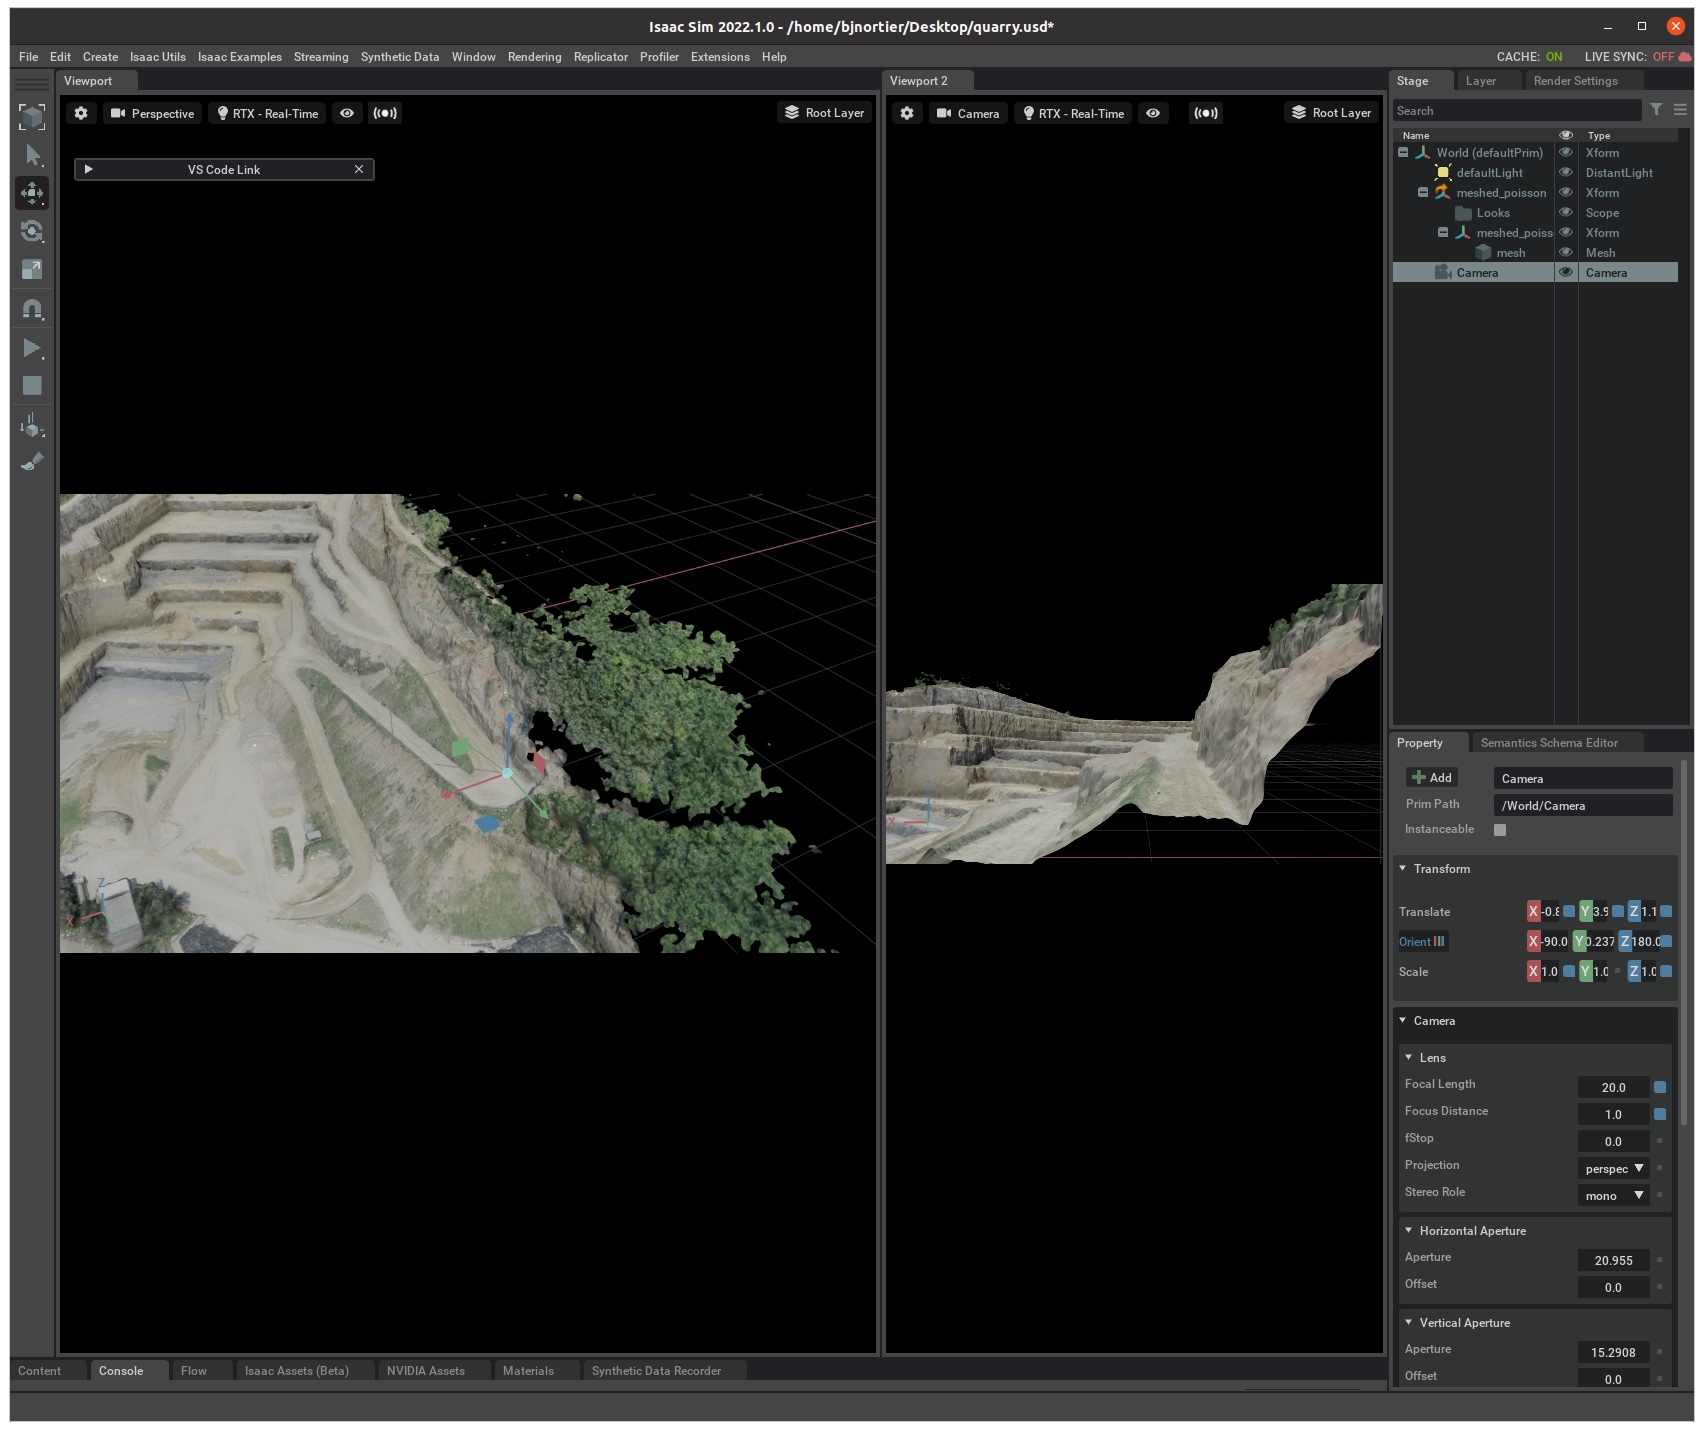
To test the Isaac Sim Sensor functionality I created a new camera to simulate a vehicle on one of the corners, and set the second viewport to use the new camera:
I captured the “view” and depth map from the vehicle using Python code. When I add navigation to the vehicle I will use this kind of sensor imaging to simulate the vehicle camera(s). Here is the code:
1
2
3
4
5
6
7
8
9
10
11
12
13
14
15
16
17
18
19
20
21
22
23
24
25
26
27
import omni.kit
from omni.syntheticdata import sensors
import omni.syntheticdata.\_syntheticdata as sd
from PIL import Image
import numpy as np

# Get the viewport with the sensor camera

vi = omni.kit.viewport_legacy.get_viewport_interface()
window = vi.get_viewport_window(vi.get_instance("Viewport 2"))

# Get the RGB sensor data and save as file

sensors.create_or_retrieve_sensor(window, sd.SensorType.Rgb)
rgb = sensors.get_rgb(window)
rgb = rgb[:,:,:3] # Discard alpha channel
rgb_image = Image.fromarray(rgb)
rgb_image.save("/tmp/rgb.png")

# Get the Depth sensor data and save as file

sensors.create_or_retrieve_sensor(window, sd.SensorType.Depth)
depth = sensors.get_depth(window)
depth_channel = np.array(depth * 255).astype(np.uint8)
depth_rgb = np.stack((depth_channel,)*3, axis=-1)
depth_image = Image.fromarray(depth_rgb)
depth_image.save("/tmp/depth.png")
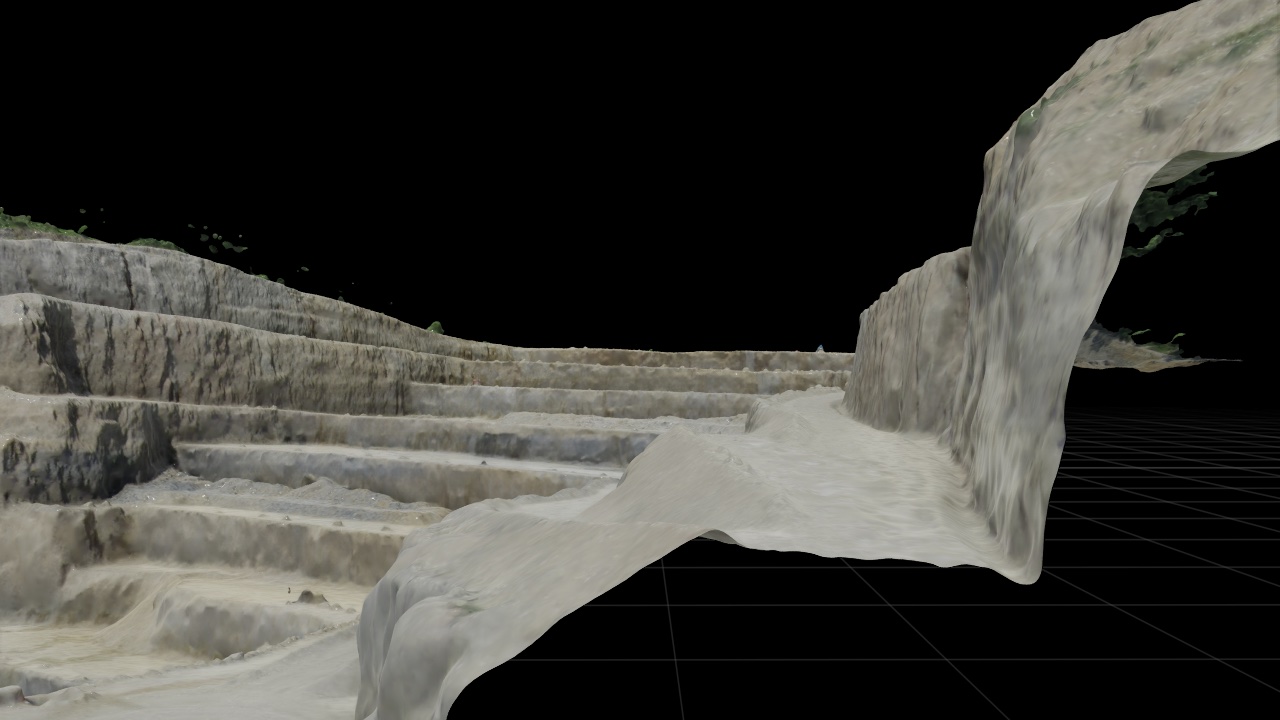
The resulting RGB:
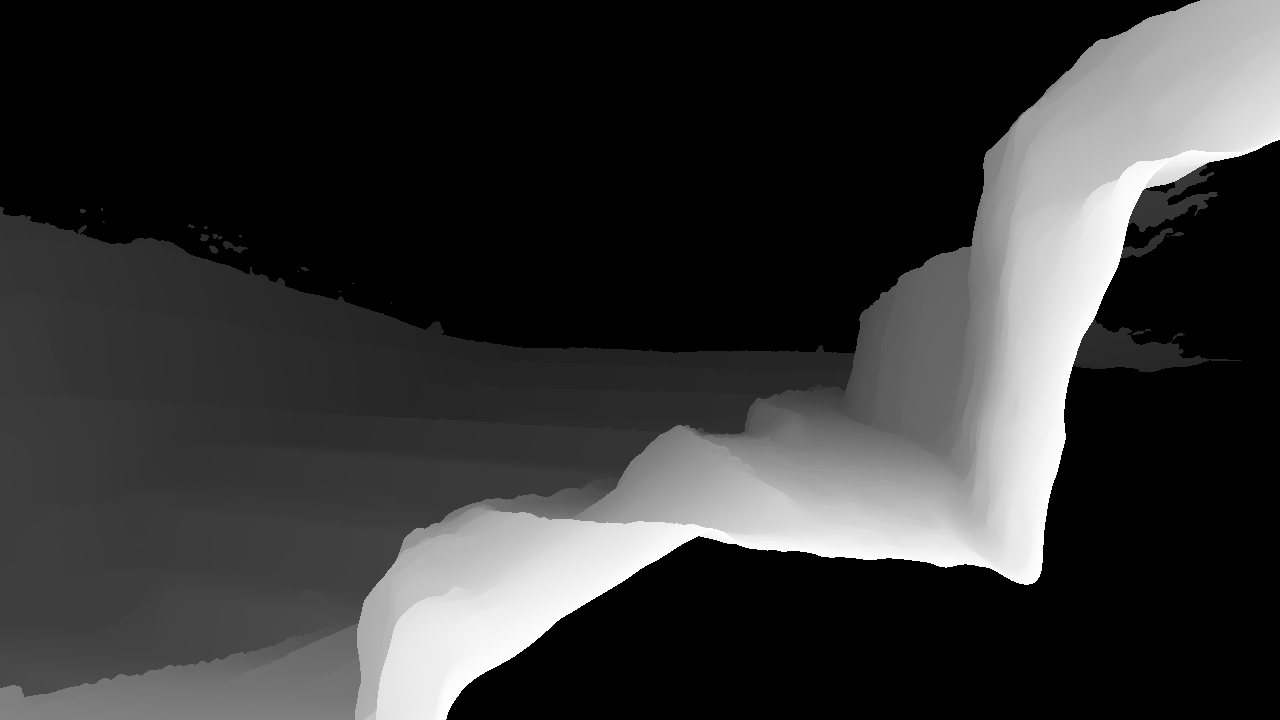
and Depth:
Conclusion & next steps
To my surprise Isaac Sim handles the mesh from COLMAP quite well. The .obj file is 2.2 GB in size and Meshlab struggled to render it but Isaac Sim has no issue (probably because it leverages NVIDIA RTX).
Out of interest, Isaac Sim uses about 4GB of GPU memory to render the quarry scene:
+-----------------------------------------------------------------------------+
| Processes:                                                                  |
|  GPU   GI   CI        PID   Type   Process name                  GPU Memory |
|        ID   ID                                                   Usage      |
|=============================================================================|
|    0   N/A  N/A      1177      G   /usr/lib/xorg/Xorg                 71MiB |
|    0   N/A  N/A      1673      G   /usr/lib/xorg/Xorg                276MiB |
|    0   N/A  N/A      1802      G   /usr/bin/gnome-shell               60MiB |
|    0   N/A  N/A      3761      G   /usr/lib/firefox/firefox           46MiB |
|    0   N/A  N/A     54711    C+G   ...saac_sim-2022.1.0/kit/kit     3990MiB |
+-----------------------------------------------------------------------------
The next step is probably to implement some kind of path planning. E.g. “calculate a path from the bottom of the quarry to the top along the roads”. I haven’t done any path planning to date so it should be interesting.